

I have always loved baskets and pots....always. I like the way that greenery in baskets looks, but I haven't done a whole lot with houseplants for a number of years. This year, I found myself bringing several new plants home one afternoon (some people bring home stray dogs and cats, for me it's picture frames, unique pots, and plants). One of the reasons I hadn't owned any houseplants in so many years was the fact that it is SUCH a pain to take them over to the sink and soak them, and then wait for them to drain, and move on to the next plant, and the next, and the next....you get the picture. So, this year, when I got the buying-houseplants bug, I decided that I would experiment and see how well these guys would do in baskets and non- draining pots. Keep your fingers crossed.
 Supplies, supplies, supplies!
  I purchased some organic potting soil, pea gravel (for drainage in the bottoms of pots-didn't have any shards this time), and some 4 ml. plastic sheeting.
 Then I decided which plants would go where.
 I began with my baskets. With this one, it was wide enough that I could plant an arrangement of five plants.
 I pulled the plastic sheeting (painter's drop cloth) through the basket and pushed it down snugly into the basket.
  Making sure I had about a foot of clearance on each side, I cut the plastic sheeting.
 Then I stretched it out and molded it inside of the basket, so that it was even around the edges and ready for planting.
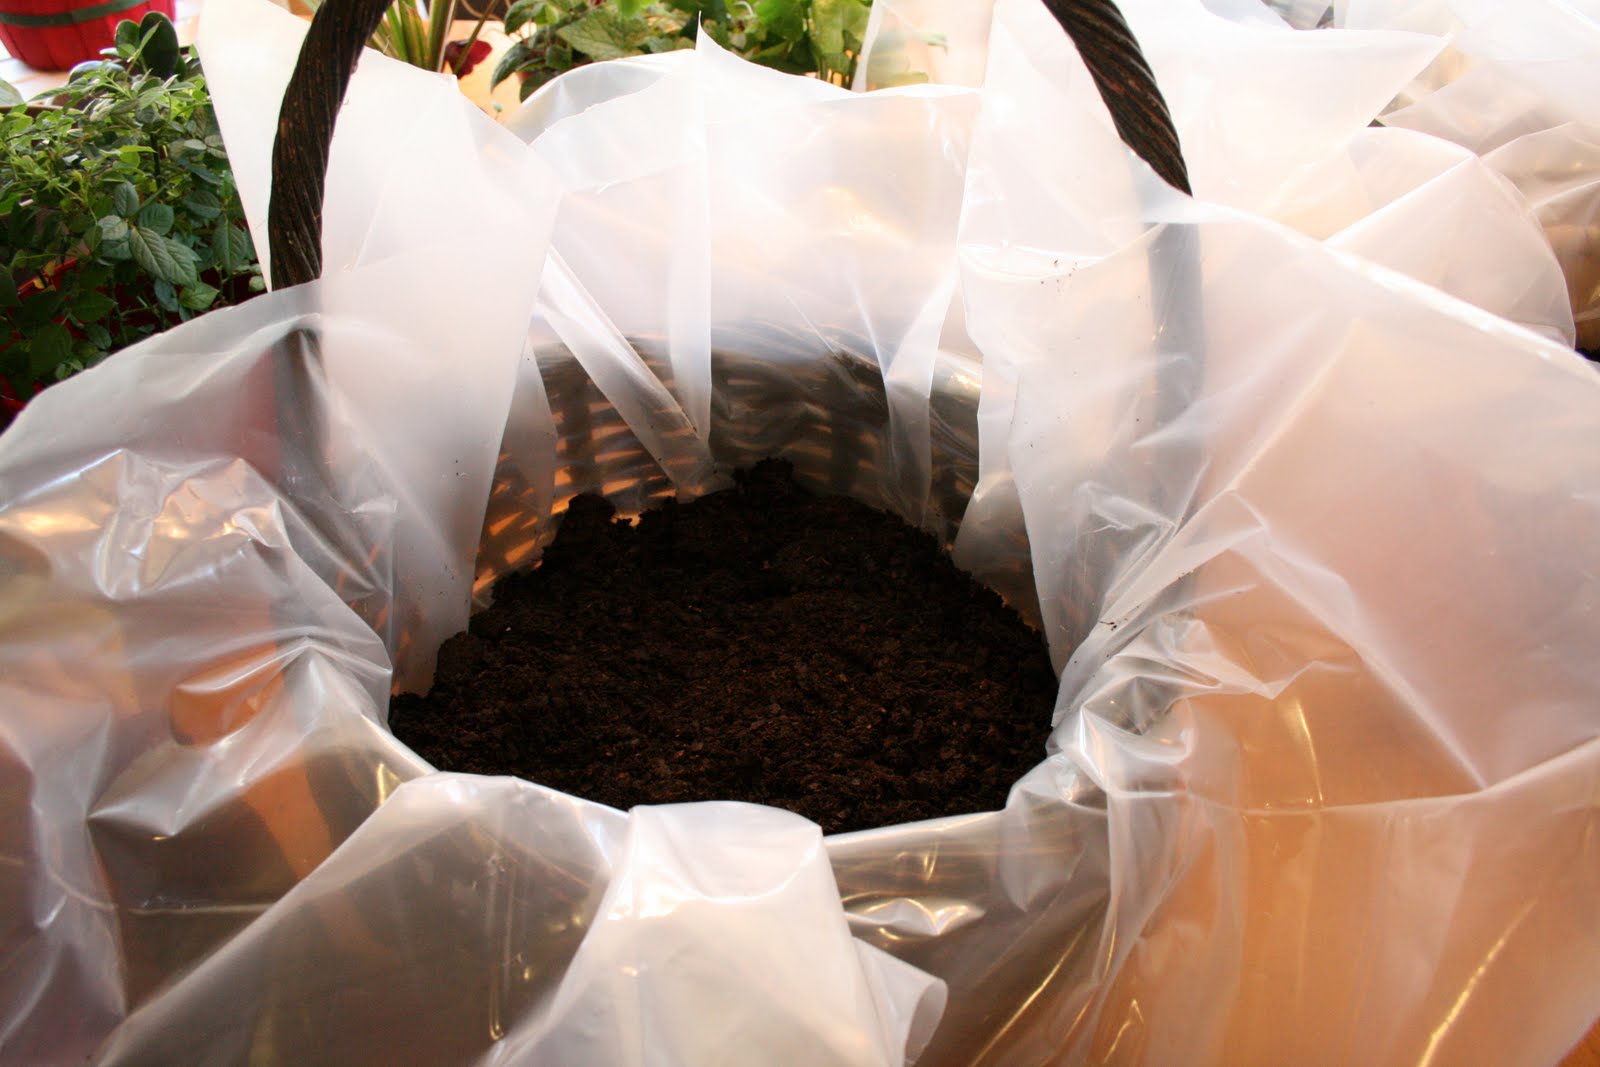 I filled the basket up about halfway with potting soil.
 I positioned my plants where I felt they would look best and made sure that the soil was at the right level for my plants to be just even with the top of the basket base.
 I removed the plants from their pots.
 I filled in around the plants with more potting soil.
 I trimmed the plastic sheeting up to about 2 inches over the edge of the basket base.
 Easy enough, right?
 I watered the soil and made sure that it was pretty moist, but not too wet because I knew that there was no way for it to drain out, and plants hate having soggy roots.
 For this basket, in particular, I chose to use Spanish moss to cover the soil around my plants. I tucked the moss in between the plastic sheeting and the basket and pulled it up over the soil, tucked neatly around my little plants.
 I continued tucking in my new little houseplants.
 Ta Da! I had now completed my very first basket full of houseplants! By the end of the year, they should be big enough that you won't even be able to see the Spanish moss anymore...if they survive. Are your fingers still crossed?
I love red...and this pot was perfect for my miniature roses.
 I began by filling the bottom of the pot with my pea gravel, to ensure the proper drainage so that my plant's roots will hopefully not get waterlogged.
 I covered the pea gravel with potting soil and made sure that the top of the rose's root ball would be even with the top of the pot.
 I took it out of it's pot and filled in around the plant with soil. Super easy stuff....I know.
 I took my washed gravel and filled in around the base of the roses so that it would look purdy.
 I thoroughly soaked the plant, drained off the excess water, and put it in a sunny location (on my awesome shelves).
 I now have a bunch of houseplants....which will need to be babysat while I am away on vacations
to exotic locations during the months that I used to have nothing to worry about...
and I love them all.
~.~ the purple sprout
oh that came out beautiful!
ReplyDeleteAnd they are all amazingly still alive, Simply Life. Can't wait to try your pizza recipe out this week. Pizza and pesto combined....mmmmm mmmm!
ReplyDelete